×
- Hello
- Login or Register
- Quick Links
- Live Chat
- Track Order
- Parts Availability
- RMA
- Help Center
- Contact Us
- Shop for
- Subaru Parts
- Subaru Accessories
My Garage
My Account
Cart
Additional information needed to check if this part fits
2007 Subaru Impreza STI
Check another vehicle- The location this part fits: Front
- Production Date: 200606 - 200609
- Fitting Vehicle Options: S.STI#
Subaru 28373FE000 Front Wheel Hub
2005-2007 Subaru 28373FE000
Customer Questions & Expert Answers (2)
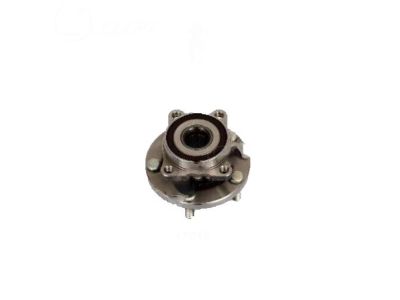
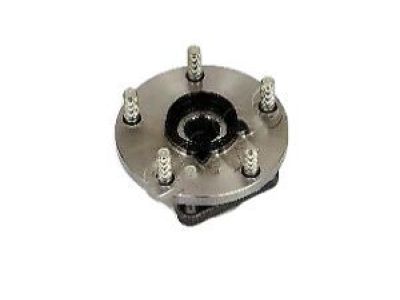
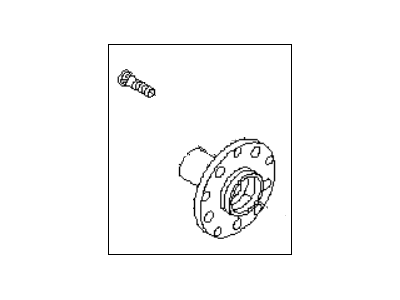
- Part DescriptionHub Complete-Front Axle
- Part Code28362
- PositionFront
- Replaced By
- ManufacturerSubaru
- Require Quantity02
- Package Quantity1
Additional information needed to check if this part fits
2007 Subaru Impreza STI
Check another vehicle- The location this part fits: Front
- Production Date: 200606 - 200609
- Fitting Vehicle Options: S.STI#
$215.64 MSRP: $315.27
You Save: $99.63 (32%)
Ships in 1-2 Business Days
1
- Related Parts
- Specifications
- Q&A
Product Specifications
Brand Genuine Subaru Part Code 28362 Manufacturer Part Number 28373FE000 Part Description Hub Complete-Front Axle Item Dimensions 8.8 x 8.8 x 6.6 inches Item Weight 7.50 Pounds Position Front Condition New Fitment Type Direct Replacement Require Quantity 2 Manufacturer Subaru SKU 28373FE000 Warranty This genuine Subaru part is guaranteed by Subaru's factory warranty. Shipping & Return Shipping Policy Return Policy Warning: California's Proposition 65Customer Questions & Expert Answers
- Q:I was wondering if this is the correct part for my vehicle? Posted by SubaruPartsDeal Specialist
- A:You can Select Your Vehicle to check if 28373FE000 fits your vehicle.Posted by SubaruPartsDeal Specialist
- Installation and Repair Tips by AI Expert
- Removal steps: 1. Park on level ground, engage parking brake, chock wheels, and wear eye/hand protection. 2. Loosen wheel lug nuts slightly while vehicle is on the ground. 3. Safely raise and support the vehicle on jack stands and remove the wheel. 4. Disconnect the negative battery terminal to isolate electrical systems before touching ABS sensor or wiring. 5. Remove or support the brake caliper so it does not hang by the hose; remove the brake rotor if needed to access the hub. 6. Unplug and detach any ABS or speed sensor wiring; note that sensor location and connector type commonly vary by design. 7. Remove any dust cap, cotter pin, or retaining fastener protecting the hub/axle nut if present. 8. Remove the axle/hub retaining nut or bolts as applicable; designs differ so use the appropriate tool and method. 9. Separate the hub/rotor assembly from the knuckle; use a puller or appropriate press if the bearing is pressed-in or stuck. 10. Unbolt or press out the bearing assembly from the knuckle depending on whether the bearing is serviceable, hub-integrated, or pressed. 11. Clean mating surfaces and inspect the knuckle, axle splines, ABS tone ring, and seals for damage. Installation steps: 1. If the new component is a pressed bearing, have it installed with a hydraulic press or professional tool; if it's a bolt-in hub, position it and start fasteners by hand. 2. Clean and lightly oil or apply manufacturer-recommended anti-seize to splines or mating surfaces only where appropriate; avoid contaminating bearing surfaces. 3. Install new seals, shields, and any new fasteners, replacing cotter pins or single-use hardware where required by design. 4. Reinstall the hub/rotor assembly into the knuckle and secure with the retaining nut or bolts; tighten progressively and refer to manufacturer torque specs (do not guess values). 5. Reconnect ABS/speed sensor wiring and ensure routing does not interfere with suspension movement. 6. Reinstall the brake rotor and caliper; ensure caliper hardware is secure and brake pads are correctly seated. 7. Reinstall the wheel, snug lug nuts, lower the vehicle to the ground, then torque lug nuts to the correct specification. 8. Reconnect the negative battery terminal. 9. With the vehicle on the ground, check for play in the hub by rocking and by spinning the wheel by hand for smoothness and absence of grinding. 10. Road-test at low speed to verify absence of noise, vibration, and correct ABS behavior; re-check fasteners and re-torque lug nuts after a short drive as recommended. 11. Repair tip: use a service manual or parts supplier data for the correct replacement type (pressed vs. hub assembly) and required torque values; if removal required a press, consider having installation done or supervised by a shop with the proper tooling.
- Q:
Why choose Subaru Parts Deal
- Dedicated Service
Your complete satisfaction is our #1 goal
- Lowest Prices
Best deals on genuine OE parts from dealerships
- Fast Delivery
Orders are processed and delivered promptly