×
- Hello
- Login or Register
- Quick Links
- Live Chat
- Track Order
- Parts Availability
- RMA
- Help Center
- Contact Us
- Shop for
- Subaru Parts
- Subaru Accessories


My Garage
My Account
Cart
Additional information needed to check if this part fits
2017 Subaru WRX
Check another vehicle- Production Date: 201601 - 201704
- Fitting Vehicle Options: 257
Subaru 42021VA000 Fuel Pump Assembly
2015-2020 Subaru 42021VA000
Customer Questions & Expert Answers (1)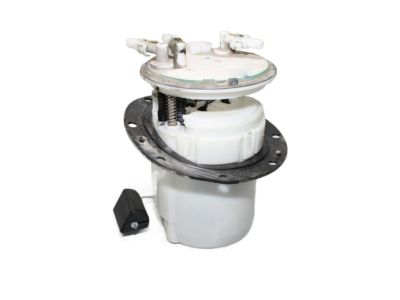
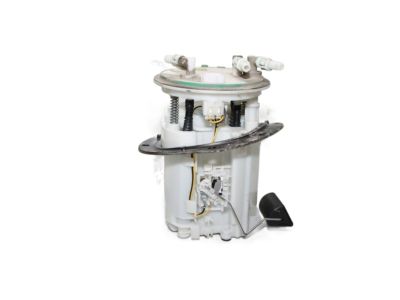
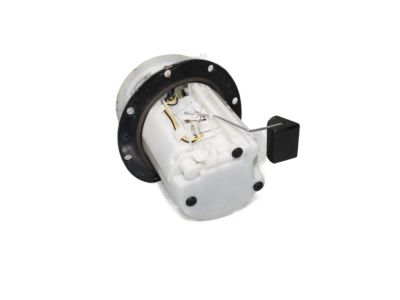
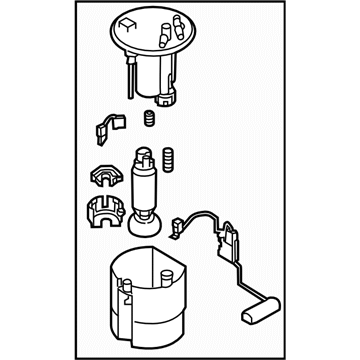
- Part DescriptionPump Assembly-Fuel
- Part Code42021
- ManufacturerSubaru
Additional information needed to check if this part fits
2017 Subaru WRX
Check another vehicle- Production Date: 201601 - 201704
- Fitting Vehicle Options: 257
$542.54 MSRP: $800.20
You Save: $257.66 (33%)
Ships in 1 Business Day
1
- Related Parts
- Specifications
- Q&A
Product Specifications
Brand Genuine Subaru Part Code 42021 Manufacturer Part Number 42021VA000 Part Description Pump Assembly-Fuel Other Names Fuel Pump Item Dimensions 17.1 x 11.4 x 7.7 inches Item Weight 3.30 Pounds Condition New Fitment Type Direct Replacement Manufacturer Subaru SKU 42021VA000 Warranty This genuine Subaru part is guaranteed by Subaru's factory warranty. Shipping & Return Shipping Policy Return Policy Warning: California's Proposition 65Customer Questions & Expert Answers
- Q:How to remove and install the Fuel Pump on Subaru WRX? Posted by Customer
- A:Removal steps 1. Park on level ground, work in a well-ventilated area, remove ignition key, wear eye protection and gloves, and eliminate ignition sources and open flames. 2. Disconnect the negative battery cable and keep it isolated while you work. 3. Relieve fuel system pressure using the vehicle's recommended method or by operating the fuel pump with the engine off until pressure drops; place rags and a fuel-safe container ready for any residual fuel. 4. Locate the fuel pump access method for the vehicle (in-tank access panel or by lowering the tank) - this varies by design, so follow the applicable procedure for your car. 5. Clean the area around any access cover or tank flange to prevent contamination of the fuel system. 6. Support the fuel tank if it must be lowered, using a jack and straps or a lift as appropriate for your workspace. 7. Disconnect electrical connectors to the pump and label them for reassembly, then cap connectors to keep them clean. 8. Disconnect fuel lines, fuel vapor lines, and vent hoses; be prepared to catch drips and plug open lines to minimize air and contamination entry. 9. Remove the pump retaining device or mounting hardware, being careful not to deform the tank flange or pump assembly. 10. Carefully extract the pump assembly straight out (note the pump orientation and any sender position) and set it on a clean, fuel-resistant surface. 11. Inspect the pump opening, mating surfaces, and sender components for debris, rust, or damage and remove loose contaminants before installing a new unit. Installation steps 1. Compare the replacement pump to the removed unit and transfer any necessary fittings or sender components if required by design. 2. Replace all sealing components (O-rings, gaskets, straps) with new parts and lightly coat seals with clean fuel or appropriate lubricant to aid seating. 3. Clean the mating surfaces one more time and position the pump assembly in the same orientation as it was removed. 4. Install the pump and secure the retaining device or mounting hardware following the manufacturer's method for seating the seal (do not guess torque values). 5. Reconnect fuel lines, vapor lines, and vent hoses using new clamps or quick-connects as appropriate, ensuring fittings are fully engaged and routed without kinks. 6. Reconnect the pump electrical connector(s) and ensure wiring is routed away from heat and moving parts. 7. If the tank was lowered, raise and properly support it back into place before final fasteners are tightened. 8. Reconnect the negative battery cable. 9. Prime the fuel system by cycling the ignition to ON several times (do not start immediately), then inspect all connections and the pump area for leaks. 10. Start the engine, listen for normal pump operation, check for leaks again, and verify operation during a short road test or functional check (fuel pressure gauge or diagnostic scan if available). 11. Dispose of any collected fuel and soaked rags safely and store removed components and new seals for warranty or future reference. Repair tip: Replace pump strainer and all seals whenever the pump is replaced, and keep dirt out of the tank opening during the entire procedure.Generated by AI Expert
- Q:
Why choose Subaru Parts Deal
- Dedicated Service
Your complete satisfaction is our #1 goal
- Lowest Prices
Best deals on genuine OE parts from dealerships
- Fast Delivery
Orders are processed and delivered promptly