×
- Hello
- Login or Register
- Quick Links
- Live Chat
- Track Order
- Parts Availability
- RMA
- Help Center
- Contact Us
- Shop for
- Subaru Parts
- Subaru Accessories
My Garage
My Account
Cart
Genuine Subaru Impreza Rod Bearing
Engine Connecting Rod Bearing- Select Vehicle by Model
- Select Vehicle by VIN
Select Vehicle by Model
orMake
Model
Year
Select Vehicle by VIN
For the most accurate results, select vehicle by your VIN (Vehicle Identification Number).
49 Rod Bearings found


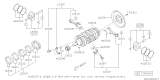
Subaru Impreza Bearing Set Connecting Rod
Part Number: 12108AB100$132.99 MSRP: $192.73You Save: $59.74 (31%)Ships in 1-3 Business Days


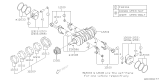
Subaru Impreza Bearing Set Connect Rod
Part Number: 12108AA890$150.71 MSRP: $220.33You Save: $69.62 (32%)Ships in 1-3 Business Days


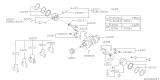
Subaru Impreza Bearing Set Connecting Rod
Part Number: 12108AB020$282.31 MSRP: $416.38You Save: $134.07 (33%)Ships in 1-2 Business Days


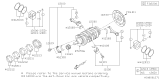
Subaru Impreza Bearing Set Connecting Rod Std
Part Number: 12108AA290$146.74 MSRP: $214.53You Save: $67.79 (32%)Ships in 1-2 Business Days

Subaru Impreza Bearing Set Connecting Rod
Part Number: 12108AA530$151.48 MSRP: $221.47You Save: $69.99 (32%)Ships in 1-3 Business DaysSubaru Impreza Bearing Set Connecting Rod
Part Number: 12108AB110$138.41 MSRP: $202.35You Save: $63.94 (32%)Ships in 1-3 Business Days
Subaru Impreza BRG SET-CONN ROD
Part Number: 12108AB790$41.91 MSRP: $60.73You Save: $18.82 (31%)Ships in 1-2 Business DaysSubaru Impreza BRG SET-CONN ROD
Part Number: 12108AB760$41.91 MSRP: $60.73You Save: $18.82 (31%)Ships in 1-2 Business DaysSubaru Impreza BRG SET-CONN ROD
Part Number: 12108AB780$41.91 MSRP: $60.73You Save: $18.82 (31%)Ships in 1-2 Business DaysSubaru Impreza BRG SET-CONN ROD
Part Number: 12108AB770$41.91 MSRP: $60.73You Save: $18.82 (31%)Ships in 1-2 Business DaysSubaru Impreza Bearing Set Connecting Rod
Part Number: 12108AB130$138.41 MSRP: $202.35You Save: $63.94 (32%)Ships in 1-3 Business DaysSubaru Impreza Bearing Set Connecting Rod
Part Number: 12108AB120$138.41 MSRP: $202.35You Save: $63.94 (32%)Ships in 1-3 Business DaysSubaru Impreza BRG SET-CONN ROD
Part Number: 12108AB791$44.01 MSRP: $63.78You Save: $19.77 (31%)Ships in 1-2 Business DaysSubaru Impreza BRG SET-CONN ROD
Part Number: 12108AB781$44.01 MSRP: $63.78You Save: $19.77 (31%)Ships in 1-2 Business DaysSubaru Impreza BRG SET-CONN ROD
Part Number: 12108AB771$44.01 MSRP: $63.78You Save: $19.77 (31%)Ships in 1-2 Business DaysSubaru Impreza BRG SET-CONN ROD
Part Number: 12108AB761$44.01 MSRP: $63.78You Save: $19.77 (31%)Ships in 1-2 Business Days
Subaru Impreza BRG SET-CONN ROD
Part Number: 12108AB750$44.01 MSRP: $63.78You Save: $19.77 (31%)Ships in 1-2 Business DaysSubaru Impreza BRG SET-CONN ROD
Part Number: 12108AB740$44.01 MSRP: $63.78You Save: $19.77 (31%)Ships in 1-2 Business DaysSubaru Impreza BRG SET-CONN ROD
Part Number: 12108AB730$44.01 MSRP: $63.78You Save: $19.77 (31%)Ships in 1-2 Business DaysSubaru Impreza BRG SET-CONN ROD
Part Number: 12108AB720$44.01 MSRP: $63.78You Save: $19.77 (31%)Ships in 1-2 Business Days
| Page 1 of 3 |Next >
1-20 of 49 Results
Subaru Impreza Rod Bearing
Our website stands as the go-to online destination for OEM Subaru Impreza Rod Bearing. With complete lines of genuine Subaru Impreza Rod Bearing available at unbeatable market prices, we ensure top quality, reliability, and durability. Each part comes backed by the manufacturer's warranty, reinforcing your trust in our offerings.
Subaru Impreza Rod Bearing Parts Questions & Experts Answers
- Q: How to reinstall Rod Bearing on Subaru Impreza?A:Once the Crankshaft and connecting rods have been cleaned and inspected, and a decision has been made regarding bearing replacement, the connecting rods can be reinstalled on the crankshaft. If new bearings are being used, check the oil clearances before the final installation of the connecting rods. If the clearances are within the specified limits, proceed with the installation. Never assume that the clearances are correct, even if new bearings are involved. Make sure the bearing faces and backs are perfectly clean, then fit them to the connecting rod and cap. The tab on each bearing must be engaged in the recess in the cap or connecting rod. Clean the number one connecting rod journal on the crankshaft, then slip the number one connecting rod into place. Ensure that the mark on the side of the connecting rod is facing the front of the crankshaft. Apply a length of Plastigage to the crankshaft journal, just off-center. Gently install the connecting rod cap in place, without turning the connecting rod on the journal. Make sure the mating mark on the cap is on the same side as the mark on the connecting rod. Lubricate the threads of the connecting rod nuts or bolts and tighten them. Remove the connecting rod nuts or bolts without allowing the connecting rod to turn on the journal, then remove the cap. Examine the Plastigage and compare its width to the scale on the Plastigage package. The connecting rod oil clearance is usually about 0.001 to 0.002 inches. Consult an automotive machine shop for the clearance specified for the rod bearings on your engine. If the clearance is within specifications, proceed with checking the other three connecting rods. If the connecting rod clearances are all within specifications, lubricate both halves of the bearings of connecting rod number 1 with moly-based assembly lube and install the connecting rod nuts or bolts. Tighten them, working up to it in three steps. Repeat the procedure for the remaining connecting rods. Do not mix up the connecting rods and caps, and do not install the connecting rods backwards. After the connecting rods have been installed, rotate them by hand and check for any obvious binding. As a final step, recheck the connecting rod side clearance.

Related Subaru Impreza Parts
 Subaru Impreza Oil Pump
 Subaru Impreza Crankshaft
 Subaru Impreza Oil Pan
 Subaru Impreza Piston Ring Set
 Subaru Impreza Crankshaft Pulley
 Subaru Impreza Oil Pan Gasket
Browse by Year
2025 Rod Bearing 2024 Rod Bearing 2023 Rod Bearing 2022 Rod Bearing 2021 Rod Bearing 2020 Rod Bearing 2019 Rod Bearing 2018 Rod Bearing 2017 Rod Bearing 2016 Rod Bearing 2015 Rod Bearing 2014 Rod Bearing 2013 Rod Bearing 2012 Rod Bearing 2011 Rod Bearing 2010 Rod Bearing 2009 Rod Bearing 2008 Rod Bearing 2007 Rod Bearing 2006 Rod Bearing 2005 Rod Bearing 2004 Rod Bearing 2003 Rod Bearing 2002 Rod Bearing 2001 Rod Bearing 2000 Rod Bearing 1999 Rod Bearing 1998 Rod Bearing 1997 Rod Bearing 1996 Rod Bearing 1995 Rod Bearing 1994 Rod Bearing 1993 Rod Bearing