×
- Hello
- Login or Register
- Quick Links
- Live Chat
- Track Order
- Parts Availability
- RMA
- Help Center
- Contact Us
- Shop for
- Subaru Parts
- Subaru Accessories
My Garage
My Account
Cart
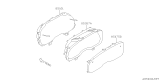
Genuine Subaru Outback Instrument Cluster
Speedometer Instrument Cluster- Select Vehicle by Model
- Select Vehicle by VIN
Select Vehicle by Model
orMake
Model
Year
Select Vehicle by VIN
For the most accurate results, select vehicle by your VIN (Vehicle Identification Number).
333 Instrument Clusters found

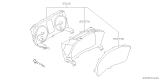
Subaru Outback Combination Meter Assembly
Part Number: 85002AN15B$344.85 MSRP: $508.63You Save: $163.78 (33%)Ships in 1-3 Business Days
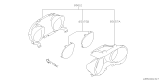
Subaru Outback Speedometer Instrument Cluster
Part Number: 85012AL03A$409.34 MSRP: $603.75You Save: $194.41 (33%)Ships in 1-3 Business DaysSubaru Outback Speedometer Instrument Cluster
Part Number: 85012AL00A$373.96 MSRP: $551.57You Save: $177.61 (33%)Ships in 1-3 Business DaysSubaru Outback Combination Meter Assembly
Part Number: 85002AN44A$381.05 MSRP: $562.02You Save: $180.97 (33%)Subaru Outback Speedometer Instrument Cluster
Part Number: 85013AL30A$453.81 MSRP: $669.33You Save: $215.52 (33%)Ships in 1-2 Business DaysSubaru Outback Speedometer Instrument Cluster
Part Number: 85013AL31A$453.81 MSRP: $669.33You Save: $215.52 (33%)Ships in 1-3 Business DaysSubaru Outback Speedometer Instrument Cluster
Part Number: 85012AL05A$409.34 MSRP: $603.75You Save: $194.41 (33%)Ships in 1-3 Business DaysSubaru Outback Combination Meter Assembly
Part Number: 85002AN17B$358.21 MSRP: $528.33You Save: $170.12 (33%)Ships in 1-3 Business DaysSubaru Outback Combination Meter Assembly
Part Number: 85002AN45A$381.05 MSRP: $562.02You Save: $180.97 (33%)

Subaru Outback Speedometer Instrument Cluster
Part Number: 85002AN03A$430.29 MSRP: $634.65You Save: $204.36 (33%)Ships in 1-3 Business DaysSubaru Outback Speedometer Instrument Cluster
Part Number: 85013AL33A$453.81 MSRP: $669.33You Save: $215.52 (33%)Ships in 1-3 Business DaysSubaru Outback Speedometer Instrument Cluster
Part Number: 85012AL02A$393.59 MSRP: $580.52You Save: $186.93 (33%)Ships in 1-3 Business DaysSubaru Outback Combination Meter Assembly
Part Number: 85002AN31A$440.97 MSRP: $650.40You Save: $209.43 (33%)Ships in 1-3 Business DaysSubaru Outback Speedometer Instrument Cluster
Part Number: 85013AL01A$451.86 MSRP: $666.47You Save: $214.61 (33%)Ships in 1-3 Business DaysSubaru Outback Speedometer Instrument Cluster
Part Number: 85013AL00A$451.86 MSRP: $666.47You Save: $214.61 (33%)Ships in 1-3 Business Days
Subaru Outback Instrument Cluster
Part Number: 85021AJ47A$220.73 MSRP: $322.70You Save: $101.97 (32%)Ships in 1-3 Business DaysSubaru Outback Combination Meter Assembly
Part Number: 85002AN43A$376.57 MSRP: $555.42You Save: $178.85 (33%)Subaru Outback Combination Meter Assembly
Part Number: 85002AN41A$376.57 MSRP: $555.42You Save: $178.85 (33%)Subaru Outback Speedometer Instrument Cluster
Part Number: 85012AL01A$399.46 MSRP: $589.17You Save: $189.71 (33%)Ships in 1-3 Business DaysSubaru Outback Speedometer Instrument Cluster
Part Number: 85013AL02A$409.33 MSRP: $603.73You Save: $194.40 (33%)Ships in 1-3 Business Days
| Page 1 of 17 |Next >
1-20 of 333 Results
Subaru Outback Instrument Cluster
Our website stands as the go-to online destination for OEM Subaru Outback Instrument Cluster. With complete lines of genuine Subaru Outback Instrument Cluster available at unbeatable market prices, we ensure top quality, reliability, and durability. Each part comes backed by the manufacturer's warranty, reinforcing your trust in our offerings.
Subaru Outback Instrument Cluster Parts Questions & Experts Answers
- Q: How to remove and reinstall the Instrument Cluster on a Subaru Outback?A:This is a difficult procedure for the home mechanic. There are many hidden fasteners, difficult angles to work in, and many electrical connectors to tag and disconnect. We recommend that this procedure be performed only by an experienced do-it-yourselfer. During removal of the instrument panel, make careful notes of how each piece comes off, where it fits in relation to other pieces, and what holds it in place. If you note how each part is installed before removing it, getting the instrument panel back together again will be much easier. It is not necessary, but it is suggested to remove both front seats to allow additional working space and lessen the chance of damage to the seats during this procedure. Disconnect the cable from the negative battery terminal. Remove the steering wheel. Remove the Center Console. Remove all of the dashboard trim panels. Remove the instrument cluster. Remove the front pillar trim. Remove the fasteners securing the steering column, then lower the steering column. Remove the sill trim/kick panels from each side. Remove the radio and the heater control assembly. Remove the passenger's side airbag mounting bolts. Disconnect the instrument panel electrical connectors. Remove the fasteners securing the instrument panel. Pull the instrument panel away from the firewall and detach any electrical connectors interfering with removal. Once all the electrical connectors are detached, lift the instrument panel, pull it away from the windshield, and remove it through the door opening. This is a two-person job. Installation is the reverse of removal.

Related Subaru Outback Parts
 Subaru Outback Dome Light
 Subaru Outback Car Speakers
 Subaru Outback Antenna
 Subaru Outback Cup Holder
 Subaru Outback Cigarette Lighter
 Subaru Outback Glove Box
 Subaru Outback Ashtray
 Subaru Outback Antenna Mast
 Subaru Outback Antenna Cable
Browse by Year
2025 Instrument Cluster 2024 Instrument Cluster 2023 Instrument Cluster 2022 Instrument Cluster 2021 Instrument Cluster 2020 Instrument Cluster 2019 Instrument Cluster 2018 Instrument Cluster 2017 Instrument Cluster 2016 Instrument Cluster 2015 Instrument Cluster 2014 Instrument Cluster 2013 Instrument Cluster 2012 Instrument Cluster 2011 Instrument Cluster 2010 Instrument Cluster 2009 Instrument Cluster 2008 Instrument Cluster 2007 Instrument Cluster 2006 Instrument Cluster 2005 Instrument Cluster 1999 Instrument Cluster 1998 Instrument Cluster 1997 Instrument Cluster 1996 Instrument Cluster