×
- Hello
- Login or Register
- Quick Links
- Live Chat
- Track Order
- Parts Availability
- RMA
- Help Center
- Contact Us
- Shop for
- Subaru Parts
- Subaru Accessories
My Garage
My Account
Cart
Genuine Subaru Legacy Cabin Air Filter
Interior Cabin Air Filter- Select Vehicle by Model
- Select Vehicle by VIN
Select Vehicle by Model
orMake
Model
Year
Select Vehicle by VIN
For the most accurate results, select vehicle by your VIN (Vehicle Identification Number).
5 Cabin Air Filters found


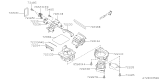
Subaru Legacy Filter
Part Number: 72880FL00A$17.56 MSRP: $25.45You Save: $7.89 (31%)Ships in 1-3 Business Days

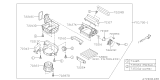
Subaru Legacy Filter
Part Number: 72880AL00A$19.49 MSRP: $28.25You Save: $8.76 (32%)Ships in 1-3 Business Days

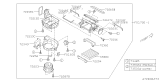
Subaru Legacy Filter
Part Number: 72880AJ00A$16.27 MSRP: $23.58You Save: $7.31 (31%)Ships in 1-2 Business Days

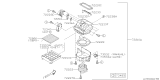
Subaru Legacy Filter
Part Number: 72880AG00A$18.25 MSRP: $26.45You Save: $8.20 (31%)Ships in 1-2 Business Days
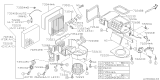
Subaru Legacy Cabin Air Filter
Subaru Legacy Cabin Air Filter is one of the remarkable parts that greatly counts on removing air pollution within the car interior compartment. This Cabin Air Filter withstands its reputation of offering reliable and outstanding performance by eliminating such particulates as well as exhaust odors and exhaust particulates from getting into the HVAC system. This is especially so for Subaru Legacy users who intend to offer their passengers a healthy environment to prevail in. Adjustable and suitable for the Legacy models manufactured between 1989 and 2020, the Cabin Air Filter assures the car's optimal performance and protection. It is important to replace the Cabin Air Filter frequently because if the filter is dirty, the air coming in is stale and puts a lot of pressure on the HVAC system thus, the performance declines. Subaru stresses on the need to maintain, as per the schedule laid down in the owner's manual particularly for those using the car in dusty environment. It is usually made of pleated paper that plays a role in increasing the capability of the Cabin Air Filter. Also, this filter of the Subaru Legacy is perfect because the car has a reputation for reliability and using advanced technologies, and this filter also sets the top benchmark among the car filter in the automotive market in as far as it is concerned with improving air quality. Subaru Legacy is a favorite car around the world with more than three million units sold, and Cabin Air Filter is one of the factors that customers rely on when it comes to car reliability.
Our website stands as the go-to online destination for OEM Subaru Legacy Cabin Air Filter. With complete lines of genuine Subaru Legacy Cabin Air Filter available at unbeatable market prices, we ensure top quality, reliability, and durability. Each part comes backed by the manufacturer's warranty, reinforcing your trust in our offerings.
Subaru Legacy Cabin Air Filter Parts Questions & Experts Answers
- Q: What are the instructions for replacing the cabin air filter in Subaru Legacy?A:The manufacturer recommends replacing the cabin air filter at the specified intervals to maintain the performance of the HVAC system. For Legacy models from 2004 and earlier, remove the glovebox, disconnect the resistor connector, remove the clips and pry the cabin air filter cover from the cooling unit. The cabin air filter cover is positioned vertically. Remove cabin air filler A (lower cabin air filter), noting that the installation arrow mark faces up. Then, remove cabin air filter B (upper cabin air filter). For 2005 and later models, remove the instrument panel side cover, remove the clip and the damper string and lower the glovebox door, and remove the cabin air filler, noting that the arrow on the face of the cabin air filler faces up. For Forester models from 2002 and earlier, working below the glovebox, remove the two clips using a flat-bladed screwdriver to unlock the hinge, remove the cabin air filter cover from the cooling unit, remove cabin air filter A (front cabin air filler), noting that the installation arrow mark faces up, and remove cabin air filter B (rear cabin air filler). For 2003 and later models, remove the glovebox and glovebox panel, remove the cabin air filter cover, and remove the cabin air filter, noting that the arrow on the face of the cabin air filter faces up. For all models, install a new cabin air filter with the arrow facing up. Installation is the reverse of removal.

Related Subaru Legacy Parts
 Subaru Legacy A/C Idler Pulley
 Subaru Legacy Blend Door Actuator
 Subaru Legacy Blower Motor
 Subaru Legacy Evaporator
 Subaru Legacy Heater Core
 Subaru Legacy Blower Motor Resistor
 Subaru Legacy A/C Expansion Valve
Browse by Year
2025 Cabin Air Filter 2024 Cabin Air Filter 2023 Cabin Air Filter 2022 Cabin Air Filter 2021 Cabin Air Filter 2020 Cabin Air Filter 2019 Cabin Air Filter 2018 Cabin Air Filter 2017 Cabin Air Filter 2016 Cabin Air Filter 2015 Cabin Air Filter 2014 Cabin Air Filter 2013 Cabin Air Filter 2012 Cabin Air Filter 2011 Cabin Air Filter 2010 Cabin Air Filter 2009 Cabin Air Filter 2008 Cabin Air Filter 2007 Cabin Air Filter 2006 Cabin Air Filter 2004 Cabin Air Filter 2003 Cabin Air Filter 2002 Cabin Air Filter