×
- Hello
- Login or Register
- Quick Links
- Live Chat
- Track Order
- Parts Availability
- RMA
- Help Center
- Contact Us
- Shop for
- Subaru Parts
- Subaru Accessories
My Garage
My Account
Cart
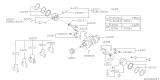
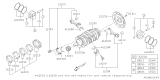
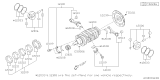
Genuine Subaru Legacy Rod Bearing
Engine Connecting Rod Bearing- Select Vehicle by Model
- Select Vehicle by VIN
Select Vehicle by Model
orMake
Model
Year
Select Vehicle by VIN
For the most accurate results, select vehicle by your VIN (Vehicle Identification Number).
72 Rod Bearings found


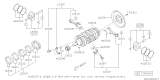
Subaru Legacy Bearing Set Connecting Rod
Part Number: 12108AB180$138.44 MSRP: $202.40You Save: $63.96 (32%)

Subaru Legacy Bearing Set Connecting Rod
Part Number: 12108AB100$132.99 MSRP: $192.73You Save: $59.74 (31%)Ships in 1-3 Business Days


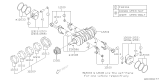
Subaru Legacy Bearing Set Connect Rod
Part Number: 12108AA890$150.71 MSRP: $220.33You Save: $69.62 (32%)Ships in 1-3 Business Days


Subaru Legacy Bearing Set Connecting Rod
Part Number: 12108AB020$282.31 MSRP: $416.38You Save: $134.07 (33%)Ships in 1-2 Business Days


Subaru Legacy Bearing Set Connecting Rod Std
Part Number: 12108AA290$146.74 MSRP: $214.53You Save: $67.79 (32%)Ships in 1-2 Business Days

Subaru Legacy Bearing Set Connecting Rod
Part Number: 12108AA530$151.48 MSRP: $221.47You Save: $69.99 (32%)Ships in 1-3 Business DaysSubaru Legacy Bearing Set Connecting Rod
Part Number: 12108AB110$138.41 MSRP: $202.35You Save: $63.94 (32%)Ships in 1-3 Business DaysSubaru Legacy Bearing Set Connecting Rod
Part Number: 12108AB130$138.41 MSRP: $202.35You Save: $63.94 (32%)Ships in 1-3 Business DaysSubaru Legacy Bearing Set Connecting Rod
Part Number: 12108AB190$138.44 MSRP: $202.40You Save: $63.96 (32%)
Subaru Legacy BRG Set-Conn Rod
Part Number: 12108AB540$138.44 MSRP: $202.40You Save: $63.96 (32%)Ships in 1-3 Business DaysSubaru Legacy Bearing Set Connecting Rod
Part Number: 12108AB120$138.41 MSRP: $202.35You Save: $63.94 (32%)Ships in 1-3 Business Days

Subaru Legacy Bearing Set-Connecting Rod
Part Number: 12108AB340$201.64 MSRP: $294.80You Save: $93.16 (32%)Ships in 1-3 Business DaysSubaru Legacy BRG Set-Conn Rod
Part Number: 12108AB570$133.03 MSRP: $192.80You Save: $59.77 (31%)Ships in 1-3 Business Days
Subaru Legacy BRG SET-CONN ROD
Part Number: 12108AB571$138.44 MSRP: $202.40You Save: $63.96 (32%)Ships in 1-2 Business DaysSubaru Legacy BRG Set-Conn Rod
Part Number: 12108AB560$138.44 MSRP: $202.40You Save: $63.96 (32%)Ships in 1-3 Business DaysSubaru Legacy BRG Set-Conn Rod
Part Number: 12108AB550$138.44 MSRP: $202.40You Save: $63.96 (32%)Ships in 1-3 Business DaysSubaru Legacy BRG SET-CONN ROD
Part Number: 12108AB541$138.44 MSRP: $202.40You Save: $63.96 (32%)Ships in 1-2 Business DaysSubaru Legacy Bearing Set-Connecting Rod
Part Number: 12108AB370$201.64 MSRP: $294.80You Save: $93.16 (32%)Ships in 1-3 Business DaysSubaru Legacy Bearing Set-Connecting Rod
Part Number: 12108AB360$201.64 MSRP: $294.80You Save: $93.16 (32%)Ships in 1-3 Business DaysSubaru Legacy Bearing Set-Connecting Rod
Part Number: 12108AB350$201.64 MSRP: $294.80You Save: $93.16 (32%)Ships in 1-3 Business Days
| Page 1 of 4 |Next >
1-20 of 72 Results
Subaru Legacy Rod Bearing
Our website stands as the go-to online destination for OEM Subaru Legacy Rod Bearing. With complete lines of genuine Subaru Legacy Rod Bearing available at unbeatable market prices, we ensure top quality, reliability, and durability. Each part comes backed by the manufacturer's warranty, reinforcing your trust in our offerings.
Subaru Legacy Rod Bearing Parts Questions & Experts Answers
- Q: How to remove the Rod Bearing on Subaru Legacy?A:Before removing the connecting rods from the Crankshaft, turn the engine with the feeler gauge, and observe the end play (side clearance, connecting rod to crankshaft throw) then do the same for the other rods also. The end play is equal to the thickness of the feeler gauge(s), it is recommended to consult an automotive machine shop for end play service limit which generally ranges from to .050 to .015" (0.127 to 0.369 mm). Past this range, new connecting rods will be required in the play of the drill string. In some instances, new rods or a new crankshaft might be inserted, and the resultant end clearance is located below the postoperatively minimum standard; hence, some machining of the rods or seeking advice with an automotive machine shop. If the rods and caps are not numbered, then try to number them in order that they could be refitted between the related cylinder and crankshaft journal, the usage of permanent ink or paint layer. With the crankshaft facing up, place one dot at the connecting rod and cap at the front of the crankshaft, mark the second one with two dots, and so on, both the rods and caps should be marked since they will needs to be separated later. After loosening the cap nuts/bolts a little more on one connecting rod, detach the cap and the bearing insert with a little more care and then pull out the connecting rod and the remainder of the bearing insert from the crankshaft journal; however it's beneficial to clamp the connecting rod along with the bearing and the cap in a way that the parts don't get mixed up. Perform this process to the other connecting rods, being very cautious not to damage the crankshaft journals with the bolts. Last, wash with solvent not intermingling the parts, then dry until they are thoroughly dry, especially the oil holes.

Related Subaru Legacy Parts
 Subaru Legacy Crankshaft
 Subaru Legacy Oil Pan
 Subaru Legacy Oil Pump
 Subaru Legacy Crankshaft Pulley
 Subaru Legacy Piston Ring Set
 Subaru Legacy Oil Pan Gasket
Browse by Year
2025 Rod Bearing 2024 Rod Bearing 2023 Rod Bearing 2022 Rod Bearing 2021 Rod Bearing 2020 Rod Bearing 2019 Rod Bearing 2018 Rod Bearing 2017 Rod Bearing 2016 Rod Bearing 2015 Rod Bearing 2014 Rod Bearing 2013 Rod Bearing 2012 Rod Bearing 2011 Rod Bearing 2010 Rod Bearing 2009 Rod Bearing 2008 Rod Bearing 2007 Rod Bearing 2006 Rod Bearing 2005 Rod Bearing 2004 Rod Bearing 2003 Rod Bearing 2002 Rod Bearing 2001 Rod Bearing 2000 Rod Bearing 1999 Rod Bearing 1998 Rod Bearing 1997 Rod Bearing 1996 Rod Bearing 1995 Rod Bearing 1994 Rod Bearing 1993 Rod Bearing 1992 Rod Bearing 1991 Rod Bearing 1990 Rod Bearing